7.1 miles (11.5 km) with 157m of total ascent
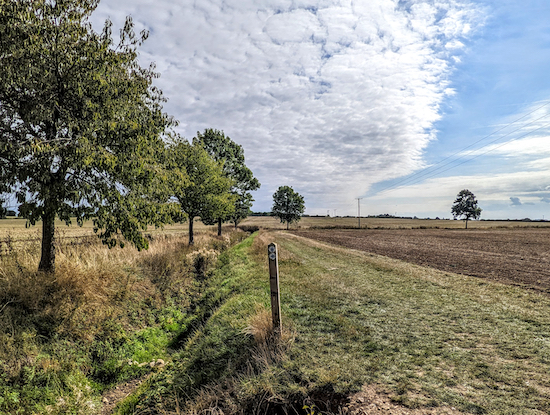 |
| A bridleway on the return leg to Buntingford |
This walk has a fair amount of up and down and offers some great open views across the north Hertfordshire Countryside. You will cross the River Rib and the River Quin twice.
This is a longer version of
another walk in our collection and shares the same lanes and paths for 900m at the start before branching off on
rights of way which we have previously not featured. There is also one section where you will be walking along footpaths and byways which we have walked before but in the opposite direction, so the views are completely different.
The route crosses livestock fields where dog owners are warned to keep their pets on a lead. You will also walk along three short stretches of lane, at the start, half-way, and near the end, where there is no pedestrian pavements, but the lanes are quiet and we didn't find it a problem.
Getting there
The starting point for the walk is
the council car park in Buntingford town centre.
There are several bus stops close to the start of the walk which are served by the number 18, 36, 36A, 37, 331, 831, and 836 buses. You can check bus times at the
Intalink site.
Fly over the route before you set off
If you want to check what sort of landscape this walk covers before setting off you can view a short 3D video of the route below. It's created using the free version of
Relive.
There are 37 photographs in the following directions. If you like to print our walks, and would like to avoid using too much ink and paper, you can delete any unwanted elements by using the PrintFriendly tool below the directions.
Click here to find out how to use PrintFriendly on this site.
Directions
 |
Walk 213: Buntingford East Long Loop
Click here or on the map for a larger version
Created on Map Hub by Hertfordshire Walker
Elements © Thunderforest © OpenStreetMap contributors
There is an interactive map below the directions |
Those with GPS devices can download
GPX or
KML files for this walk. We've added
What3Words location references for those who use that system. If you print these walks you might want to use the green
PrintFriendly icon at the bottom of these directions to delete elements such as photographs.
We parked in the
East Hert's public car park off Bowling Green Lane (location -
https://w3w.co/shippers.boots.stocked). There are public toilets (location -
https://w3w.co/shiny.matchbox.dragon) at the pedestrian exit from the car park (location -
https://w3w.co/means.intention.salmon). At the time of writing the car park is free-of-charge on Saturdays, Sundays, and bank and public holidays but charges apply at some other times. In September 2022 the fees were as follows. For this walk we paid for £2.20 for the all day ticket; it's a long walk.
 |
| Charges for the public car park |
1: From the car park head E passing the public toilets on the right and continuing to High Street with
Buntingford Coffee Shop on your right (location -
https://w3w.co/coasted.factored.lowest). Cross High Street turning diagonally to your right then turn left down Church Street (location -
https://w3w.co/prettiest.outcasts.arts), then head E see image below.
 |
Cross High Street then head E down Church Street to the River Rib
|
After 100m you will pass the
Fox & Duck on the left (location -
https://w3w.co/bulldozer.price.fallback).
 |
| The Fox & Duck on Church Street, Buntingford |
Continue for another 60m to a bridge over the
River Rib (location -
https://w3w.co/rings.atlas.miss), see image below.
 |
| Cross the River Rib then head NE and E along The Causeway |
2: Cross the River Rib, now on The Causeway which is a paved road, then head NE for 45m then ENE ignoring paths to your left and continuing for 570m until you reach a track on the right (location -
https://w3w.co/scrubber.prowl.blown), see image below. There is no pedestrian pavement along this stretch of The Causeway.
 |
| Turn right off The Causeway on Buntingford restricted byway 8 |
3: Turn right off The Causeway on Buntingford
restricted byway 8 then head E along a shaded stretch for 210m until you reach open fields (location -
https://w3w.co/affords.models.amicably), see image below.
 |
| Continue heading E on Buntingford restricted byway 8 |
Continue heading E on Buntingford restricted byway 8 for 210m until you reach a footpath on the right (location -
https://w3w.co/origin.circling.conjured), see image below.
 |
| Turn right on Buntingford footpath 34 |
4: Turn right on Buntingford footpath 34 then head S for 390m, with Haley Hill Ditch on your left and the field on your right, until you reach Hare Street Road (location -
https://w3w.co/firework.marching.shirts), see image below.
 |
| Cross Hare Street Road then head S on Buntingford footpath 24 |
5: Cross Hare Street Road then continue heading S, now on Buntingford footpath 24, with the ditch on your left and field on your right, for 210m until you reach a junction (location -
https://w3w.co/registers.chair.gracing), see image below.
 |
| Turn left at the junction on Buntingford footpath 16 |
6: Turn left at the junction then follow Buntingford footpath 16 across a footbridge over Haley Hill Ditch before reaching a gate. There is a warning sign on that gate advising dog owners to keep their pets on a lead, see image below.
 |
| Warning sign on gate to Buntingford footpath 16 |
Go through the gate then enter a livestock field where sheep were grazing when we walked the route. Turn diagonally to your left after crossing the bridge then head NE for 100m (location -
https://w3w.co/exploring.disarmed.applied) then E for 245m to a gate (location -
https://w3w.co/depth.compacts.gripes), see image below.
 |
| Go through the gate, cross a track then go through another gate |
7: Go through the gate, cross a track then go through another gate (currently painted white - 21/9/2022) then head SE on a path with the grand title of Buntingford
restricted byway 17. Follow this restricted byway (which looks like a footpath) for 60m until you reach the corner of a tennis court (location -
https://w3w.co/steams.wrenching.partly), see image below.
 |
| Once past the tennis court head ESE then SE |
Once past the tennis court follow the path as it bends left past a bush (see orange arrow on the image above) then head ESE then SE across a field (which is rich in wild flowers in the summer) for 160m, still on Buntingford restricted byway 17, until you reach a high metal and wire gate (location -
https://w3w.co/stood.eggshell.headboard), see image below.
 |
| Go through the gate then turn left and head E |
8: Go through the gate, which is held fast with a hook, then turn left and head E for 85m to a junction (location -
https://w3w.co/cutaway.workshops.galloped), see image below.
 |
| At the junction the path bends to the right then left |
9: At the junction the path, which is now Buntingford restricted byway 18, bends to the right then left as you keep heading E, with the woodland on the left and the field on the right, until you reach the edge of the woodland on your left (location -
https://w3w.co/trickling.squabbles.sailors) and the path bends to the right to head SSE. Follow the Buntingford restricted byway 18 SSE for 85m until it bends left just before a tree (location -
https://w3w.co/mimed.threaded.baseballs), see image below.
 |
| Keep left, still on Buntingford restricted byway 18 |
10: Keep left, still on Buntingford restricted byway 18, then head E for 260m, with the hedgerow on the right and the field on your left, until the byway crosses a parish boundary and becomes
Hormead restricted byway 14 (location -
https://w3w.co/topmost.romantics.retina).
Hormead restricted byway 14 now heads ENE for 200m until it enters woodland (location -
https://w3w.co/vouch.captures.tungsten), see image below.
 |
| Continue heading ENE, still on Hormead restricted byway 14 |
11: Continue heading ENE, still on Hormead restricted byway 14, which is also known as Swan Lane at this point, and follow it for 340m until you reach the B1368 in Hare Street (location -
https://w3w.co/worlds.brush.seat).
* There is a pub in Hare Street, The Beehive (location - https://w3w.co/chap.wriggle.drips), which is on the left 390m N along Hare Street. This pub was featured in the film "The Hitchhiker's Guide To The Galaxy as The Horse and Groom.
 |
| Turn left on the B1368 - Image courtesy of Gerry Gross |
12: Turn left on the B1368 then head N for 90m looking for a footpath on the right running along the side of a house (location -
https://w3w.co/imparts.incursion.spines), see image below.
 |
| Turn right on Hormead footpath 9 |
13: Turn right on Hormead footpath 9 then head E for 250m until you reach a footbridge over the
River Quin (location -
https://w3w.co/spurring.outnumber.crispy), see image below.
 |
| The bridge over the River Quin |
14: Cross the River Quin then head ENE on Hormead footpath 11 for 450m until you cross a track (location -
https://w3w.co/slant.decanter.then), see image below.
 |
| Cross the track then continue heading ENE still on Hormead footpath 11 |
15: Cross the track then continue heading ENE, still on Hormead footpath 11, for 385m until you reach Horseshoe Lane in Great Hormead (location -
https://w3w.co/climbing.carpeted.enabling), see image below.
 |
| Turn left on Horseshoe Lane - image courtesy of Gerry Gross |
16: Turn left on Horseshoe Lane then follow it ENE for 160m to a junction (location -
https://w3w.co/enjoys.report.supplied). There is no pedestrian pavement along this stretch of road. Keep left at the junction then head N and down Horseshoe Hill for 170m to reach the B1038 (location -
https://w3w.co/reshape.speaks.loaning).
 |
Turn left when you reach the B1038
Image courtesy of Gerry Gross |
17: Turn left when you reach the B1038 then take the footpath immediately opposite (location -
https://w3w.co/scrapping.evoked.interrupt), see image below.
 |
| Turn right on Hormead footpath 2, also known as Halfacre Lane |
Turn right on Hormead footpath 2, which is also known as Halfacre Lane, then follow it N for 120m until you come to a track (location -
https://w3w.co/airports.dull.duet). Turn left on the track then head NW for 25m until you reach a junction (location -
https://w3w.co/silly.evolving.pleaser), see image below.
 |
| Turn right at the junction then head N for 150m |
18: Turn right at the junction, still on Hormead footpath 2, then head N for 150m until you reach a junction (location -
https://w3w.co/snoozing.twin.tickling).
19: Turn left at the junction, still on Hormead footpath 2, then head W then NW for 190m (location -
https://w3w.co/verifying.buyers.flocking), see image below.
 |
| At this point we followed the field boundary to the left |
20: At this point both the Ordnance Survey app/map and the
Hertfordshire County Council Rights of Way map shows Hormead footpath 2 crossing the field in the image above. However, when we walked this route on 21 September 2022 the footpath had not been reinstated, and walkers had clearly decided to follow the boundary of the field, which we did, too, to avoid walking on the crop.
See map of our detour below. The official route is marked in orange. The route we took along the edge of the field is marked in green and is the route used in
the free GPX file that we have published with this walk.
 |
| The official route is in orange, our detour is in green |
To follow the same detour continue heading W for 430m with the hedgerow on the left and field on the right until you reach a right-hand bend by the River Quin (location -
https://w3w.co/euphoric.playoffs.described). Turn right at the bend then head N for 190m, with the hedgerow on your left and field on your right, until you reach a marker post and a footbridge on the left (location -
https://w3w.co/hairspray.potato.vote), see image below.
 |
| Turn left at the marker post then cross a footbridge |
21: Turn left at the marker post then cross a footbridge, still on Hormead footpath 2. Once across the River Quin turn right then head N then NNW, with the hedgerow and River Quin on your right and the field on your left, for 280m until you reach a junction just beyond a tree (location -
https://w3w.co/sobs.questions.station), see image below.
 |
| Head NNW, now Hormead bridleway 1 |
22: Once past the tree continue heading NNW, now on Hormead bridleway 1, for 580m until you reach the B1368 (location -
https://w3w.co/motels.crowds.foresight), see image below.
 |
| Turn right on the B1368 then head NNW keeping on the verge |
23: Turn right on the B1368 then, walking along the grass verge, head NNW for 95m until you reach a byway on the left (location -
https://w3w.co/cupboards.flinches.staging), see image below. There is no pedestrian pavement along this stretch of road.
 |
| Turn left on Anstey restricted byway 16 |
24: Turn left on
Anstey restricted byway 16 then head WSW for 1.2km. Along the way the byway you are walking will cross two parish boundaries. You will not notice the change. You will start on Anstey restricted byway 16, which becomes Hormead restricted byway 25, which then becomes
Wyddial restricted byway 11.
There is a well-placed bench with a great view on the right just after Beauchamp's Wood (location -
https://w3w.co/laminated.clown.intersect).
 |
| The bench with a view on the right just after Beauchamp's Wood |
25: After passing the bench the byway is both Buntingford restricted byway 11 and Wyddial restricted byway 11 and continues heading WSW for 295m until it bends to the left (location -
https://w3w.co/printouts.beside.carrots) then head SSE for 50m to a junction (location -
https://w3w.co/provider.optimists.tolerates), see image below.
 |
| Turn right on Buntingford bridleway 10 |
26: Turn right on Buntingford bridleway 10 then head WSW for 210m to a junction (location -
https://w3w.co/post.ordinary.diets), see image below.
 |
| Cross Haley Hill Ditch then turn left on Buntingford bridleway 4 |
27: Cross Haley Hill Ditch then turn left on Buntingford bridleway 4. Head SSE, with Haley Hill Ditch and the trees on your left and the field on your right. Continue for 90m until the bridleway bends to the right (location -
https://w3w.co/tadpoles.totals.entrust).
 |
| Follow Buntingford bridleway 4 SW for 300m with the ditch on the left |
Follow Buntingford bridleway 4 SW for 300m, with Haley Hill Ditch on the left and the field on your right, until you reach a junction (location -
https://w3w.co/extension.fetches.cornfield), see image below.
 |
| Turn right at the junction, still on Buntingford bridleway 4 |
28: Turn right at the junction, still on Buntingford bridleway 4, then head W for 235m to a junction in the hedgerow (location -
https://w3w.co/snooping.calms.saunas). Keep heading W, still on Buntingford bridleway 4, for 200m until the footpath bends left then heads S for 135m to a junction (location -
https://w3w.co/staining.horizons.spooned), see image below.
 |
| Turn right on Buntingford bridleway 3 |
29: Turn right on Buntingford bridleway 3 then head WSW for 85m until you reach a lane with the entrance to
Layston Church on the right (location -
https://w3w.co/shirts.bunk.intricate).
* The church is now a private residence after being restored, and the grounds and the church are not open to the public.
Turn right on the lane then head NW for 190m ignoring the first path on your left (location -
https://w3w.co/headings.weeded.knots) and continuing until you reach a footpath on the left (location -
https://w3w.co/intrigued.noisy.fittingly), see image below.
 |
| Turn left on Buntingford footpath 32 |
30: Turn left on Buntingford footpath 32 then head SW for 95m then W for 240m until you reach Wyddial Road (location -
https://w3w.co/junior.scribble.mental).
31: Turn left on Wyddial Road then head W for 220m to a bridge over the River Rib (location -
https://w3w.co/contact.bookcases.fondest). There is no pedestrian pavement along this stretch of road.
32: Cross the River Rib then continue heading W, now on Vicarage Road, for 320m until you reach a junction and a mini roundabout (location -
https://w3w.co/waking.trappings.scooter).
33: Turn left on Ermine Street (which becomes High Street) then head SSE for 350m until you reach Buntingford footpath 30 on the right immediately before
Buntingford Coffee Shop (location -
https://w3w.co/polygraph.merge.holly).
34: Turn right on Buntingford footpath 30 then head WSW for 90m to the car park. There are public toilets on the left alongside the footpath to the car park.
There are four pubs in Buntingford:
The Crown (location -
https://w3w.co/sketch.regret.glassware),
The Black Bull (location -
https://w3w.co/tilt.bracing.absorbing),
The Jolly Sailor (location -
https://w3w.co/remains.intestine.sank), and
The Fox and Duck (location -
https://w3w.co/stickler.planet.corkscrew).
For those interested in local history there is an information board at the car park.
Click here or on the image below to see a larger version.
 |
| Click on the image for a larger version of the photograph |
Interactive map


Great walk as ever. Thanks. Plenty of redwing and fieldfare about. Steve & Ann
ReplyDeleteWe loved that walk too. A good hike. And glad to hear about the redwing and fieldfare. I would have loved to have seen them. Do you carry binoculars? You always seem to hit the jackpot with wildlife.
DeleteYes, we always have our trusty bins 🙂
ReplyDeleteIf I take binoculars the birds seem to have a day off. If I don't take them they all turn up. :-(
DeleteA really lovely walk, no shade or much shelter from the wind, so pick the right day, but it has loads of glorious views so pick a sunny one like I did today! You are treated to a few fields of Alpacas near the end!
ReplyDelete