4.7 miles (7.5 km) with 98m of total ascent
 |
| This walk offers wide open views |
This is a lovely walk from Buntingford heading east over rolling open countryside to the hamlet of Hare Street and then back along old byways and footpaths. At one point the route goes through a field of wild flowers. The starting point is in Buntingford town centre. There are several pubs in Buntingford, one at the halfway point, and cafes at the start and finish point. There is not a lot of shade on this walk.
Getting there
There are several bus stops in Buntingford which are close to the start of the walk. To find the best bus for you please go to the
Intalink website then enter 'Buntingford' in the 'Explore' field. All the bus stops will then be revealed. Click on any to find out which buses stop there.
Fly through preview of walk
If you want to check what sort of landscape you will be crossing before you set off on this walk you can view a short 3D video of the route below. It's created using the free version of
Relive.
Directions
 |
Map for Walk 197: Buntingford East Short Loop
Click on the map for a larger version
Created on Map Hub by Hertfordshire Walker
Elements © Thunderforest © OpenStreetMap contributors
There is an interactive map below the directions |
Those with GPS devices can download
GPX or
KML files for this walk. We've added
What3Words location references for those who use that system. If you print these walks you might want to use the green
PrintFriendly icon at the bottom of these directions to delete elements such as photographs.
We parked in the
East Hert's public car park off Bowling Green Lane (location -
https://w3w.co/shippers.boots.stocked). There are public toilets at the pedestrian exit from the car park (location -
https://w3w.co/means.intention.salmon). At the time of writing the car park is free-of-charge on Saturdays, Sundays, and bank and public holidays but charges apply at some other times. In August 2022 the fees were as follows.
 |
| Charges for the East Hert's public car park |
1: From the car park head E passing the public toilets on the right and continuing to High Street with
Buntingford Coffee Shop on your right (location -
https://w3w.co/coasted.factored.lowest). Cross High Street turning diagonally to your right then turn left on Church Street (location -
https://w3w.co/prettiest.outcasts.arts), then head E see image below.
 |
Cross High Street then head E down Church Street to the River Rib
|
After 100m you will pass the
Fox & Duck on the left (location -
https://w3w.co/bulldozer.price.fallback). Continue for another 60m to a bridge over the
River Rib (location -
https://w3w.co/rings.atlas.miss), see image below.
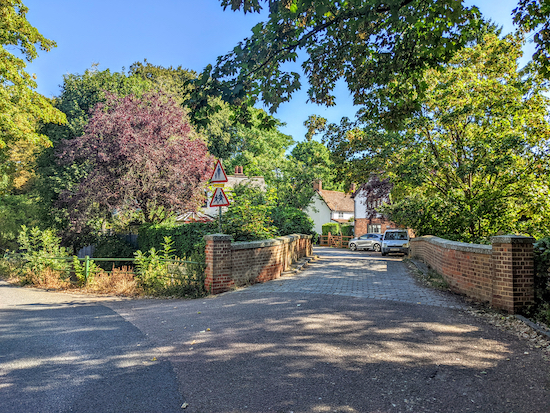 |
| Cross the River Rib then head NE and E along The Causeway |
2: Cross the River Rib, now on The Causeway which is a paved road, then head NE for 45m then ENE ignoring paths to your left and continuing for 570m until you reach a track on the right (location -
https://w3w.co/conducted.startles.ridiculed), see image below.
 |
| Turn right off The Causeway on Buntingford restricted byway 8 |
3: Turn right off The Causeway on Buntingford
restricted byway 8 then head E along a shaded stretch for 210m until you reach open fields (location -
https://w3w.co/waltz.september.ramps), see image below.
 |
| Continue heading E on Buntingford restricted byway 8 |
Continue heading E on Buntingford restricted byway 8 for 940m, ignoring footpaths and
bridleways joining from the left and right, until you reach a junction (location -
https://w3w.co/redeeming.dots.roughness), see image below.
 |
| Cross the junction then continue heading E across a field |
4: Cross the junction (see the direction of orange arrow on image above) then continue heading E across a field, still on Buntingford restricted byway 8, for 300m until you reach a wooded hedgerow (location -
https://w3w.co/commented.melts.composts), see image below.
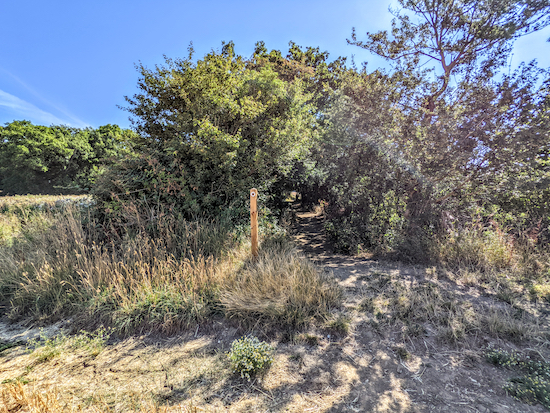 |
| Follow Buntingford restricted byway 8 through the wooded hedgerow |
Follow Buntingford restricted byway 8 E for another 90m. As you walk through the wooded hedgerow you cross a parish boundary and you will emerge in an open field on Hormead restricted byway 15 (location -
https://w3w.co/belief.sprayed.prices), see image below.
 |
| Continue heading E, now on Hormead restricted byway 15 |
5: Continue heading E, now on Hormead restricted byway 15, for 610m until you reach the B1368 in Hare Street (location -
https://w3w.co/fall.clutches.spin).
 |
| Cross the B1368 then turn right and head S |
6: Cross the B1368 then turn right and head S along the pedestrian pavement. After 140m you will pass
The Beehive on the right (location -
https://w3w.co/melt.toolbar.carpeted), see image below.
 |
| The Beehive in Hare Street |
Continue heading S through Hare Street for 360m until you reach Oak Cottage on the left (location -
https://w3w.co/schematic.euphoric.parkway), see image below.
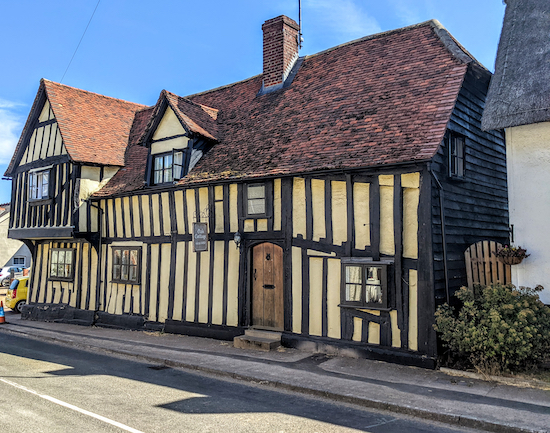 |
| Oak Cottage, Hare Street |
7: When you reach Oak Cottage cross the road turn left then take the footpath on the right immediately after the Old Swan (location -
https://w3w.co/instincts.tapes.snipe), see image below.
 |
| Take the footpath on the right immediately after the Old Swan |
Follow this track, which is known as Swan Lane and is also Hormead restricted byway 14, see image of Swan Lane below.
 |
| Swan Lane which is also Hormead restricted byway 14 |
Continue heading WSW for 340m until you reach open fields (location -
https://w3w.co/occupations.impulses.topical), see image below.
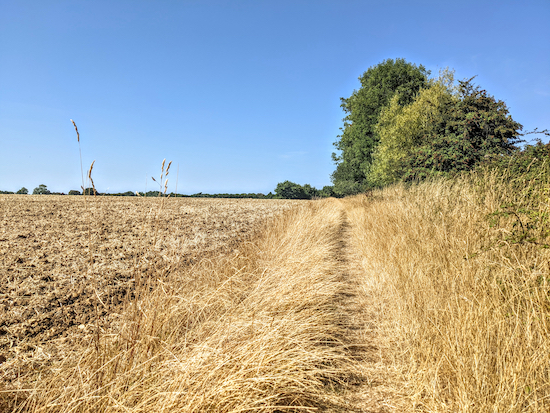 |
| Hormead restricted byway 14 heading WSW |
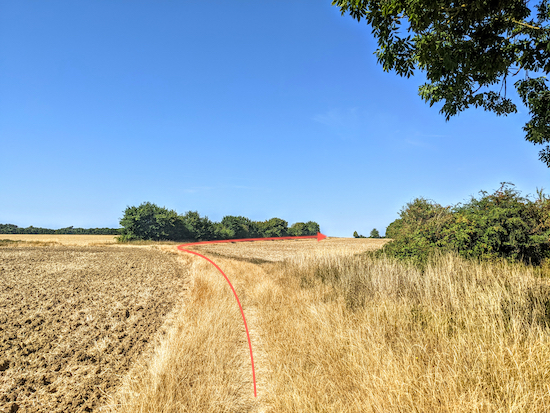
8: Continue heading WSW for 200m until the byway bends (location -
https://w3w.co/drifting.remarked.soaps), see orange arrow on image below. After this bend you will cross the parish boundary and will be following Buntingford restricted byway 18.
 |
| Continue, now heading WNW for 280m until you reach a junction |
Continue, now heading WNW for 280m until you reach a junction (location -
https://w3w.co/bronzer.simulates.kicked), see image below.
 |
| Turn right at the junction towards Alswickhall Wood |
9: Turn right at the junction then head NW for 90m until you reach Alswickhall Wood (location -
https://w3w.co/aunts.faster.script). Turn left when you reach the woodland, still on Buntingford restricted byway 18, then head W for 200m, with the woodland on the right and field on the left, until you reach a gate on the right (location -
https://w3w.co/sands.dignitary.mice), see image below.
 |
| Keep left at the first gate and continue W with field on the left |
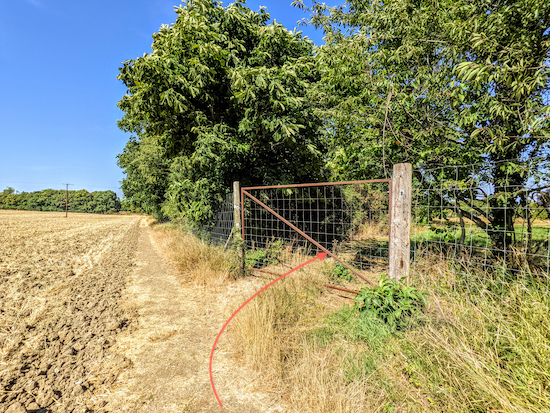
Keep left at the first gate and continue W with field on the left and trees on the right for 85m until you reach a gate on the right (location -
https://w3w.co/trouble.clicker.weddings), see image below.
 |
| Go through the gate then head NW for 30m |
10: Go through the gate, now on Buntingford restricted byway 17, then head NW for 30m until the byway bends left just after a tree on the left (location -
https://w3w.co/recline.prank.readings), see image below.
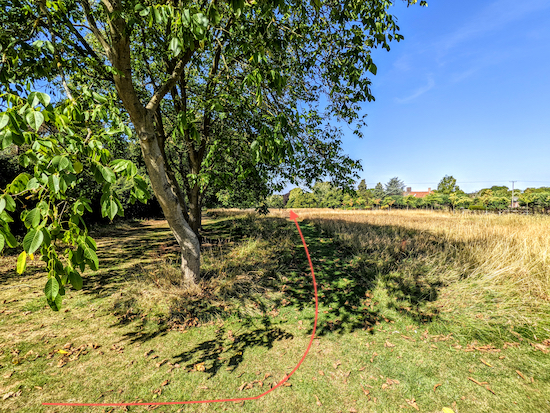 |
| Follow Buntingford restricted byway 17 across a field of wild flowers |
Follow Buntingford restricted byway 17 WNW across a field of wild flowers for 140m before reaching a tennis court on the left (location -
https://w3w.co/unlucky.doubts.treat), see image below.
 |
| Turn right at the tennis court then follow the line of the orange arrow |
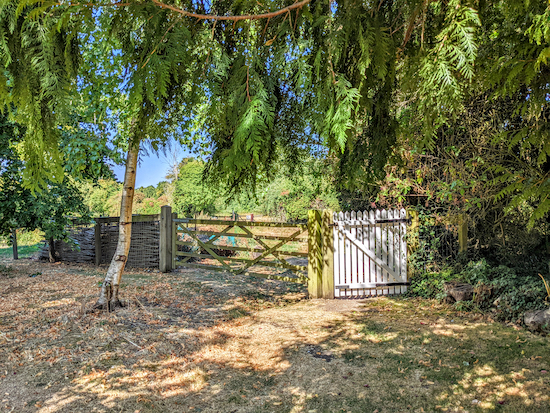
Turn right at the tennis court then follow the byway past a bench on the right to a white gate (location -
https://w3w.co/meanings.small.animator), see image below.
 |
| Follow the byway past a bench on the right to a white gate |
11: Go through the gate then continue to a junction (location -
https://w3w.co/blows.loom.swells). Cross the junction then go through a gate leading to Buntingford footpath 16, see image below.
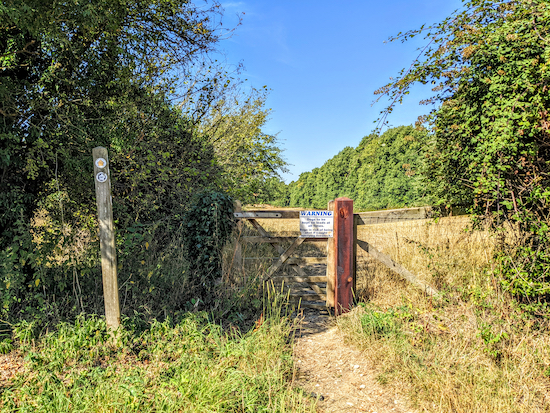 |
| Buntingford footpath 16 heading W |
Head W on Buntingford footpath 16 for 240m. There are signs along this stretch warning that dogs must be kept on a lead.
 |
| Signs at both ends of this stretch warn that dogs must be kept on a lead |
Continue until Buntingford footpath 16 bends left after a fence (location -
https://w3w.co/guitar.reclusive.city) then heads SW for 90m to a gate in the hedgerow (location -
https://w3w.co/attending.puff.stables), see line of orange arrow on the image below.
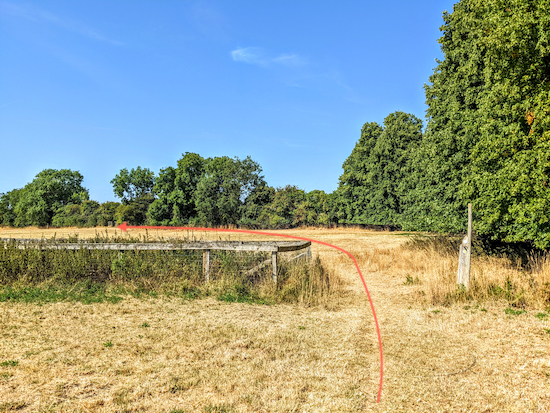 |
| The footpath bends left after the fence then heads SW to a gate |
12: Go through the gate, cross a wooden footbridge, then turn immediately left through the hedgerow on Buntingford footpath 25 (location -
https://w3w.co/socialite.hammocks.monument), see image below.
 |
| Turn left immediately after the footbridge on Buntingford footpath 25 |
Follow Buntingford footpath 25 SSW for 450m until you reach Owles Lane (location -
https://w3w.co/able.guardian.expiring). Turn right on Owles Lane, see image below.
 |
| Head W on Owles Lane |
13: Head W on Owles Lane for 270m until you reach a footpath on the right (location -
https://w3w.co/friend.inflating.patrolled), see image below.
 |
| Turn right on Buntingford footpath 21 |
14: Turn right on Buntingford footpath 21 then head WNW for 160m until the footpath bends right through a new housing estate (location -
https://w3w.co/singers.gullible.morphing), see image below.
 |
| Follow Buntingford footpath 21 as it bends right then heads NW |
15: Head NW, still on Buntingford footpath 21, until you cross a road (location -
https://w3w.co/raced.surprises.careful).
16: Once across the road continue heading NW and follow the path round to the left, see orange line on image below.
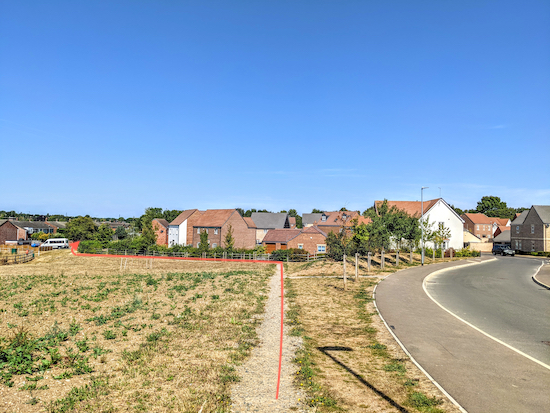 |
| Head NW, still on Buntingford footpath 21. See line of orange arrow |
17: After 160m you will cross Dray Gardens (location -
https://w3w.co/uplifting.window.prevented), cross the road then continue along the footpath, see image below.
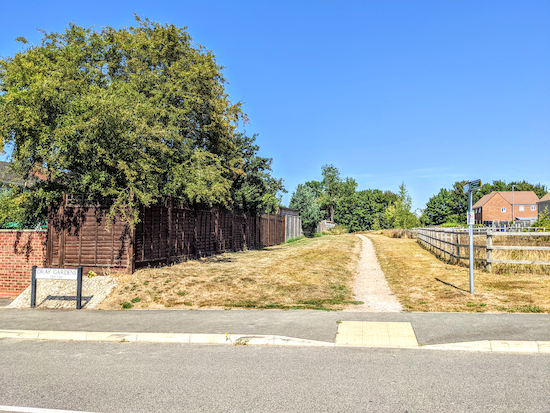 |
| Cross Dray Gardens then continue on Buntingford footpath 21 |
After 205m you will reach a junction (location -
https://w3w.co/consumed.undertone.sums), see image below. Take the path between the fence and the house.
 |
| Take the path that goes between the fence and the house |
18: After 70m you will reach Hare Street Road (location -
https://w3w.co/ringers.composed.kinder). Turn left then head WSW for 45m until you reach Union Terrace (location -
https://w3w.co/classmate.bulge.fragments) on the right immediately before
The Jolly Sailors (location -
https://w3w.co/paddocks.stepping.monument), see image below.
 |
| Turn right on Union Terrace then head NNE |
* At this point, if you want to visit pubs, cafes and shops in Buntingford you could continue walking W on Hare Street Road for 30m passing The Jolly Sailors on your right to reach High Street where you turn right and head N for 340m back to the starting point.
Turn right on Union Terrace then head NNE for 70m until you reach a path running along the side of the River Rib (location -
https://w3w.co/improve.apartment.proofs), see image below.
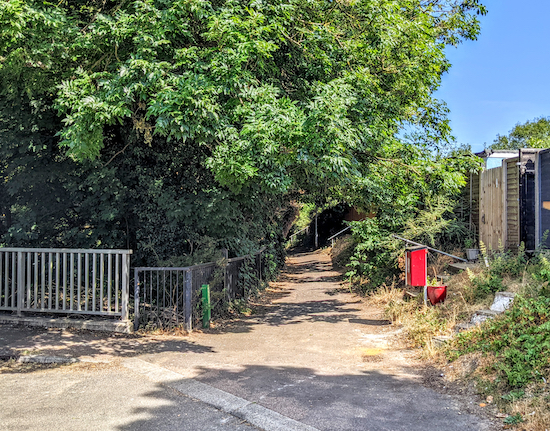 |
| Follow this path back to The Causeway |
Follow this path, with the River Rib on your left, for 320m until you reach The Causeway (location -
https://w3w.co/rainwater.tasters.grounded). Turn left, cross the bridge you crossed earlier in the walk, see image below, then retrace your steps back up Church Street and on to High Street (location -
https://w3w.co/smoothly.cabs.fuel) and the cut through (location -
https://w3w.co/bank.woodstove.enough) to the car park and the starting point.
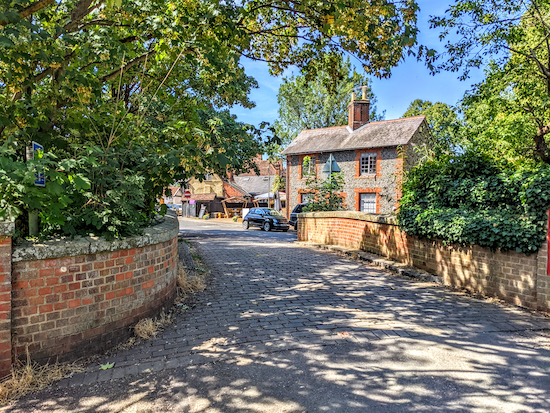 |
| Turn left on The Causeway then cross the bridge over the River Rib |
There are two more pubs in Buntingford:
The Crown (location -
https://w3w.co/sketch.regret.glassware), and
The Black Bull (location -
https://w3w.co/tilt.bracing.absorbing). There is another cafe in Buntingford called
Emily's Kitchen (location -
https://w3w.co/whites.sneezing.avoiding).
For those interested in local history there is an information board as you leave the car park.
Click here or on the image below to see a larger version.
 |
| Click on the image for a larger version of the photograph |
Interactive map


Hi David Just a little update on todays walk . The field to walk across at Point 4 had been ploughed and very heavy would suggest walking round edge . Walking through wooded hedgerow and half way down to Point 6 is a bog caused by many horses , easier to walk in the field next to path . I enjoyed the walk . Thank You . ( May be a summer Walk )
ReplyDelete.IR.
Thanks for the update, Ian. I am sure many walkers will find your report useful. This time of the year is difficult. We got covered in mud on today's walk. Hope it didn't spoil your walk. Dave
DeleteLovely walk! Super clear - we've been in July and would recommend longer trousers for walking through fields over shorts!
ReplyDeleteHi Helen, we made the same mistake yesterday testing Walk 240 which I have just published. Walked in shorts and got nettled. I never learn. :-)
DeleteJust to let you know, the car park in Buntingford is no longer free at weekends.
ReplyDeleteThanks for the update
Delete